Building Your Own Canvas Supports
- haleyindorato
- Mar 11, 2024
- 3 min read
Making your own canvases instead of buying them premade is more cost effective in the long run. Plus, it allows for specific and unconventional dimensions you can’t find in stores.

In college, when I first learned how to build canvas supports, I was taught on a very big, expensive Sawstop table saw. After graduating I no longer had access to table saws, and the smaller bench saws I would borrow from neighbors didn’t feel as safe as the one’s at school.
A little while ago I came across a Youtube video that I haven’t been able to find since, of an artist who uses a power hand planer instead. I tried it out and am very happy with the results.
Here are the steps to building your own canvas frame:
To start, get some 1x2s from a lumber or hardware store. I was making two frames, so I bought some 8ft and 6ft nicer quality pine boards.
Measure and cut the dimensions needed for each side, leaving a few extra inches.

Take the planer and run it along one edge a few times to bevel it. I bought a used table vice to hold the board in place, but having someone hold the board works as well.
The angle only needs to be around 10 degrees to work, but I like to bevel my edges a little more so I know the canvas will only touch along the edge.

Next use a miter saw or miter box to cut 45 degree angles at the edge of each board. It’s important to make sure the highest part of the bevel is on the outside, so the wood
slopes inward (if that makes sense).

I use corner clamps to be extra sure the boards meet at a right angle. However, it’s not entirely necessary with this process if you glue the corners with a wood glue. I usually go with clamps if I ever need to take the frame apart to ship.

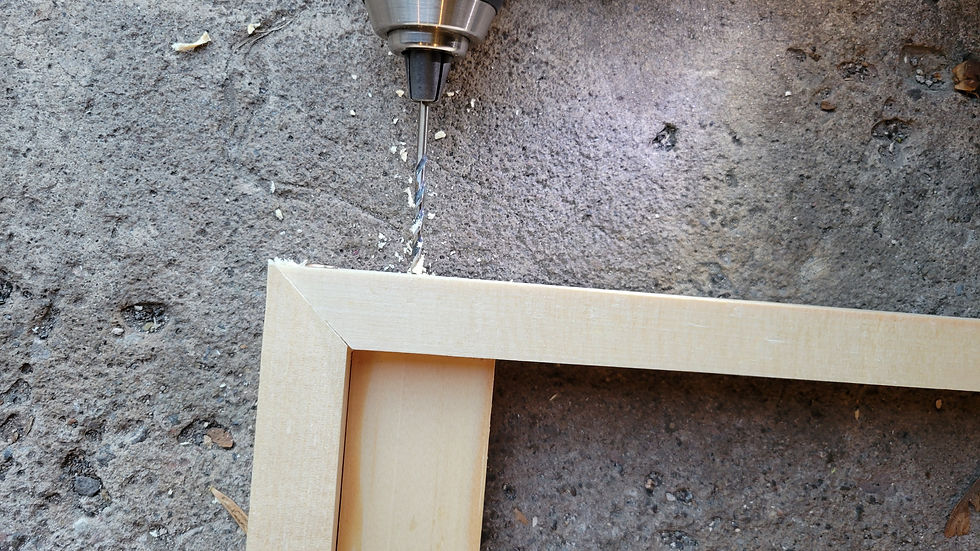
Then I'm going to put one screw in each corner. When screwing frames together, it’s better to drill a pilot hole first, so the wood doesn’t splinter. To select the right drill bit, hold the screw you are using over the bits until you find one that is slightly smaller than the shaft of the screw.

Drill the pilot hole so it goes through both boards.

Then the screw. It should go in pretty easily. You'll also see and feel the boards tighten together from the screw.

Next, measure the inside dimensions of one of the sides. It doesn’t matter which one first.
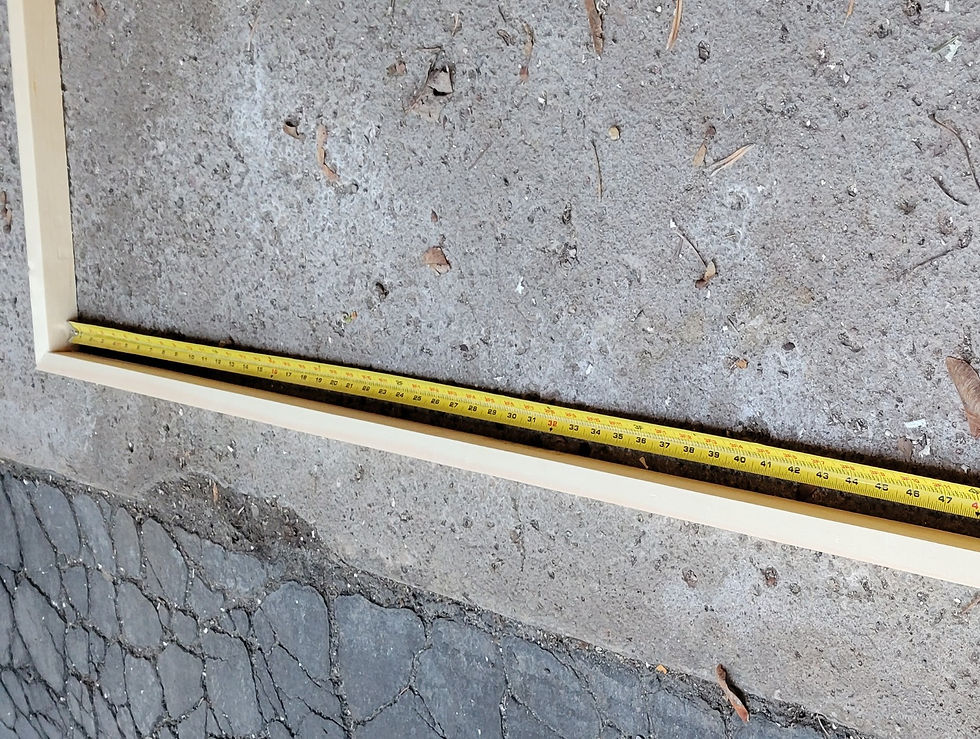
Cut one of the boards to that measurement and fit it inside the frame as shown.

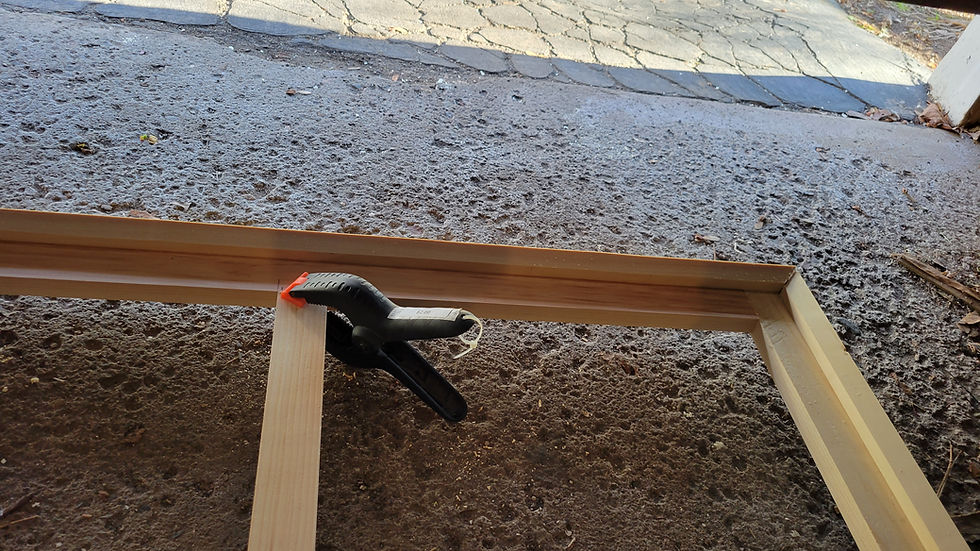
Next, drill pilot holes to screw the two pieces of wood together. To keep the wood in place while drilling, you can use F or C clamps.

I like to put one screw in the ends and a few in the side. This step squares up the edges of the canvas and makes it sturdier.
Then measure the distance of the inside of the other pair of sides and repeat the same steps as above.
Now, we need to cut supports to go in the center. Since this painting was larger, I needed three supports. I measured the distance needed and made sure each board fit before cutting the others. Sometimes you have to squeeze the boards in at an angle to get them to fit. But it’s better if they’re snug and actually supportive then too small with a gap between the two pieces of wood.

To attach these center supports I used a spring clamp to hold the wood in place.
In this case, the drill isn’t long enough to reach where the screw has to go. So first, I use the biggest drill bit to drill a hole into the wood. You don't want to drill all the way in. In this case I only drilled until I reached the second board. (If we consider the outside most piece one.) This is the step were safety glasses are the most important. Big wood shavings can going flying up into your face.

Then I switch it out for the smaller bit and drill the pilot hole as usual. I’m also using longer screws here. It’s important to be careful and drill the pilot holes as straight as possible so the screw doesn’t come out the side of the wood.


Once all the supports are in, you have to cut even more supports that go along the center of the canvas. In this method they are offset so it is easier to screw the wood in place. Make sure to measure the distance correctly. Then use the spring clamps and larger drill bit as necessary.

Finally, the support of the canvas is done. Next, it’s time to stretch!
But that can wait for another tutorial.


Comments